Skip to content
The Best Fluffy Pancakes recipe you will fall in love with. Full of tips and tricks to help you make the best pancakes.
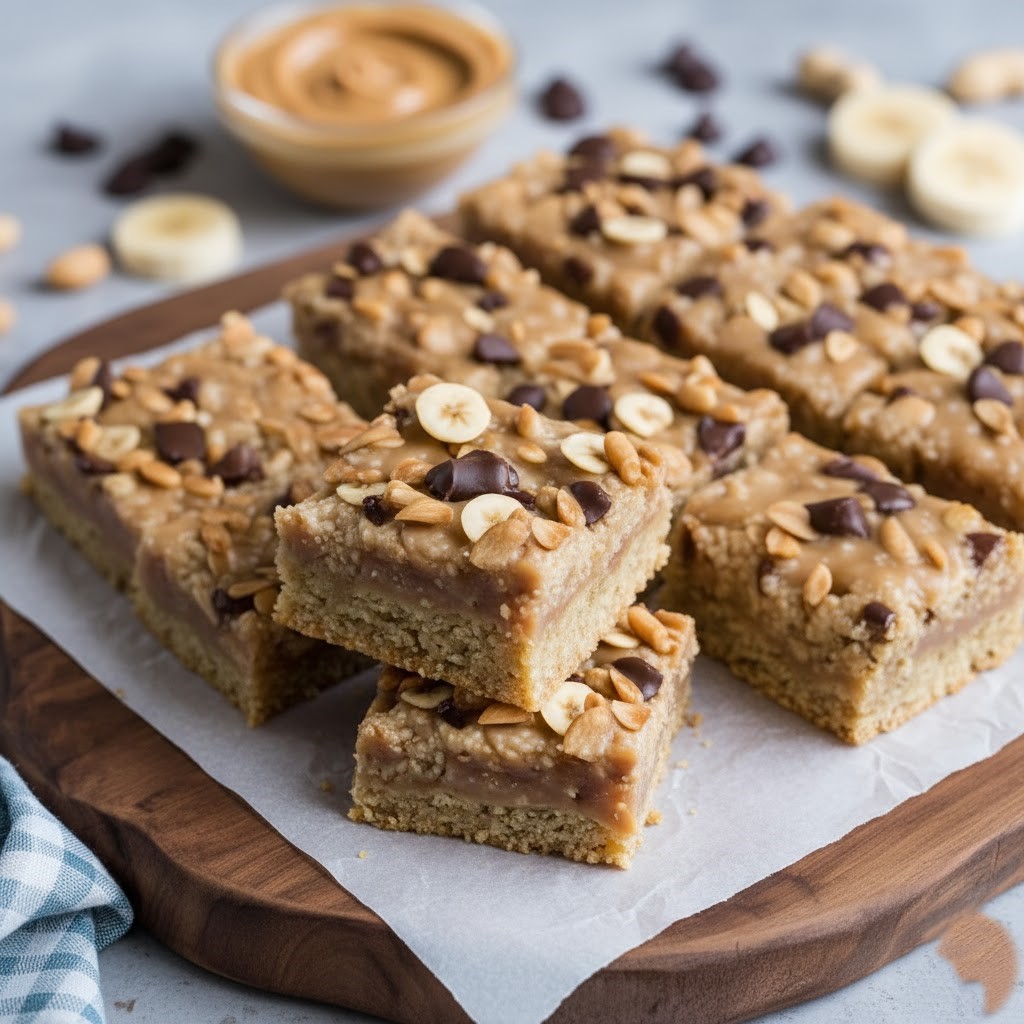
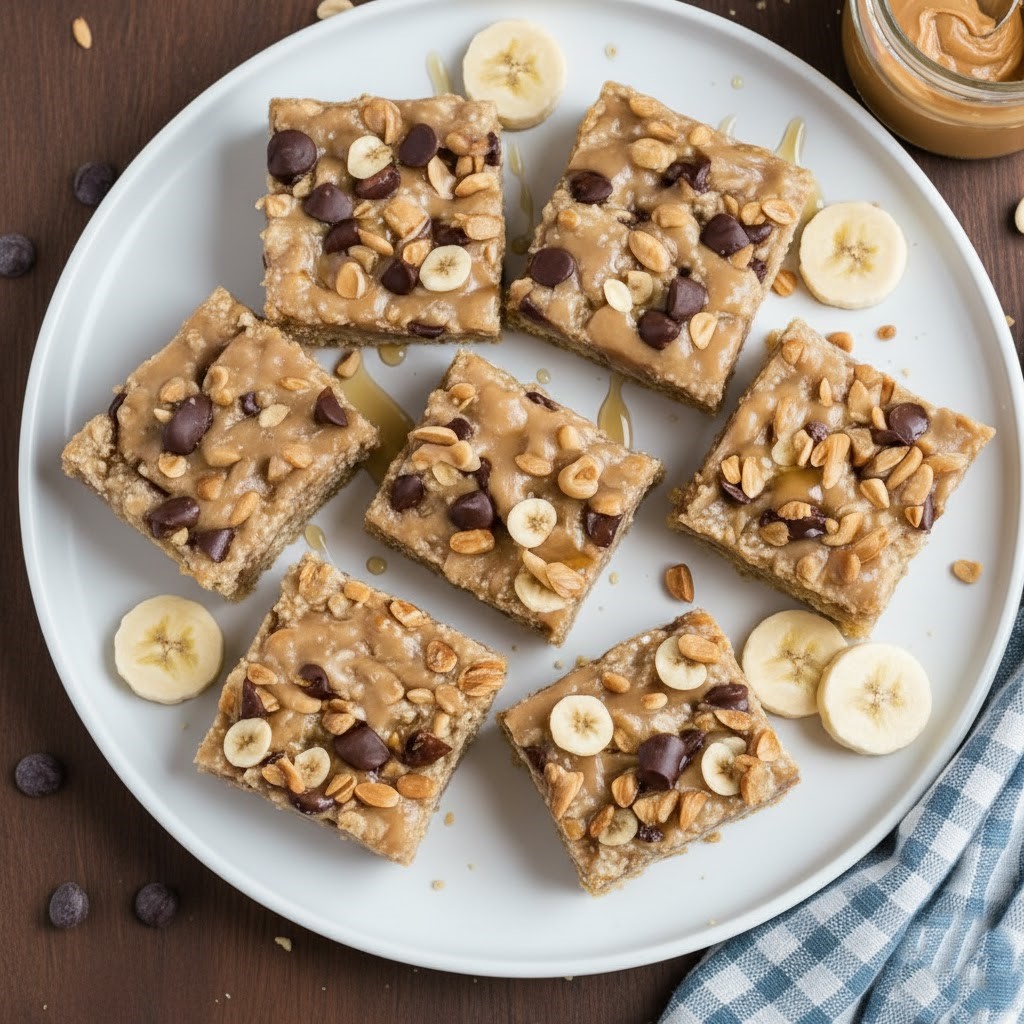
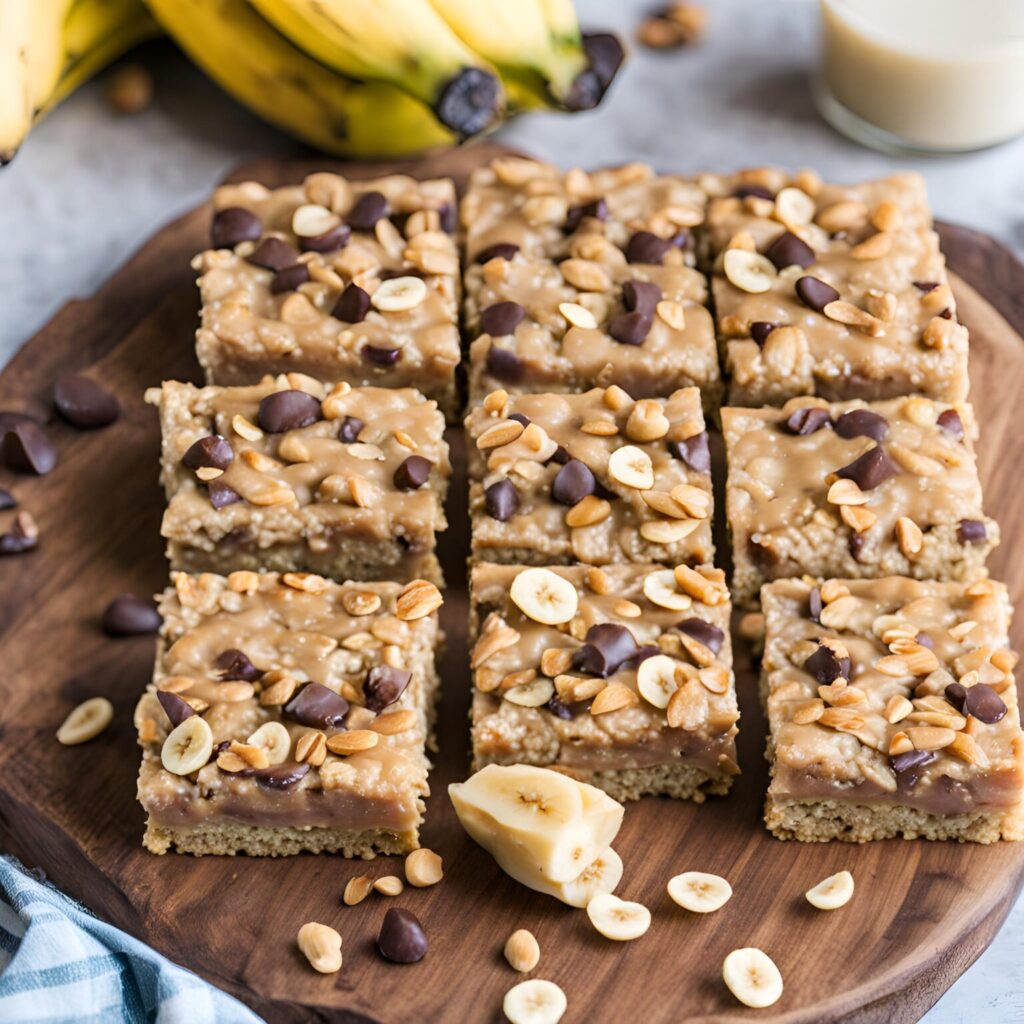
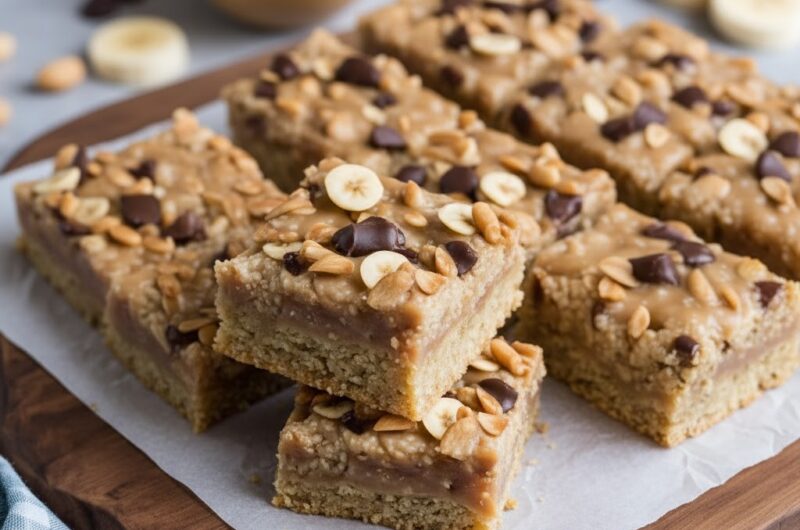
Banana Peanut Butter Oatmeal Bars Recipe: Dairy Free and Gluten Free
By Jennifer
I love recipes that are quick to make, healthy, and taste like dessert at the same time. These Banana Peanut Butter Oatmeal Bars are one of my favorite snacks to enjoy any time of the day.
Jump to RecipeThey’re soft, chewy, and packed with natural sweetness from ripe bananas and creamy peanut butter.
I usually make a batch on weekends to enjoy as a breakfast on busy mornings or as a post-workout snack.
They keep me full and satisfied without feeling heavy. What I like most is that these bars are made with wholesome ingredients—no refined sugar or butter, just simple pantry staples.
Whether you’re craving a healthy treat or looking for a quick on-the-go bite, these bars are perfect.
I often pair them with coffee in the morning or a glass of milk in the evening for a cozy snack. Once you try them, you’ll see why they’re a staple in my kitchen.
Quick Recipe Info
| Category | Information |
|---|---|
| Calories (per bar) | ~180 kcal |
| Protein | 6g |
| Carbohydrates | 25g |
| Fats | 7g |
| Fiber | 3g |
| Sugar | 10g (natural from banana and honey) |
| Gluten-Free | Yes (if using certified gluten-free oats) |
| Vegan | Yes (if using maple syrup instead of honey) |
| Dairy-Free | Yes |
| Refined Sugar-Free | Yes |
Why You’ll Love This Recipe
- It’s made with simple, wholesome ingredients that you probably already have at home.
- These bars are naturally sweetened with ripe bananas and a touch of honey or maple syrup.
- They’re gluten-free, dairy-free, and easy to make vegan.
- Perfect for breakfast, snacks, or even a healthy dessert.
- They store well, making them great for meal prep or lunchboxes.
- You can customize them with add-ins like chocolate chips, nuts, or dried fruits.
- Soft, chewy, and perfectly balanced with the flavors of banana and peanut butter.
Ingredients to Make Banana Peanut Butter Oatmeal Bars
They’re simple, healthy, and most are probably already in your pantry.
Here’s everything you’ll need:
2 ripe bananas – The riper, the better! Overripe bananas add natural sweetness and moisture, so you don’t need much added sugar. They also help bind everything together.
1/2 cup creamy peanut butter – This adds richness, protein, and that delicious nutty flavor. You can use almond or cashew butter if you prefer.
1/4 cup honey or maple syrup – I like to use honey for extra sweetness, but maple syrup works perfectly if you want a vegan option. It balances the earthy oats and peanut butter.
2 cups rolled oats – Old-fashioned rolled oats give the bars structure and a chewy bite. If you want a gluten-free version, make sure to use certified gluten-free oats.
1 teaspoon vanilla extract – Vanilla enhances the overall flavor and adds a hint of warmth to every bite.
1/2 teaspoon cinnamon – A touch of cinnamon pairs beautifully with banana and peanut butter, making the bars taste cozy and aromatic.
1/2 teaspoon baking powder – This helps the bars puff up slightly and stay soft instead of dense.
Pinch of salt – A little salt brings out the sweetness and balances the flavors.
Optional add-ins – I often toss in a handful of dark chocolate chips, chopped nuts, or dried fruits like cranberries or raisins for texture and variety.
Each ingredient plays a role in making these bars chewy, flavorful, and satisfying. The best part is that you can easily adjust the sweetness or add more crunch depending on your taste.
Steps to Make Banana Peanut Butter Oatmeal Bars

I always find this recipe relaxing to make because it doesn’t require any fancy equipment. You just need one bowl, a spatula, and a baking dish. Here’s how I make them:
Step 1: Mash the Bananas
Start by peeling the ripe bananas and placing them in a large mixing bowl. Using a fork, mash them until smooth with no big lumps left. The smoother the banana, the better the texture of the bars will be. The mashed banana will act as a natural sweetener and binder.
Step 2: Add the Wet Ingredients
To the mashed bananas, add the creamy peanut butter, honey (or maple syrup), and vanilla extract. Stir everything together until the mixture is thick and well combined. This forms the base that gives the bars their chewy texture and nutty sweetness.
Step 3: Mix the Dry Ingredients
Next, add the rolled oats, baking powder, cinnamon, and salt into the wet mixture. Stir gently until all ingredients are evenly coated. The batter should be slightly sticky and thick, not too dry. If it feels too dry, add one or two tablespoons of almond milk to help bind it better.
Step 4: Fold in Add-Ins
Now it’s time to make the bars extra special. Fold in any add-ins you like—chocolate chips, chopped nuts, or dried fruits. This step is optional but adds texture and makes every bite exciting. I personally love adding dark chocolate chips for a dessert-like version.
Step 5: Bake the Bars
Preheat your oven to 350°F (175°C). Line an 8×8-inch baking dish with parchment paper. Spread the mixture evenly into the pan and press it down firmly using the back of a spoon. Bake for 20–25 minutes, or until the edges turn golden and the top looks set.
Step 6: Cool and Slice
Once baked, remove the dish from the oven and let it cool completely in the pan. This step is important because it helps the bars firm up and hold their shape. After cooling, slice them into squares or rectangles and enjoy!
Serving Suggestions
These Banana Peanut Butter Oatmeal Bars are so versatile that I enjoy them at any time of the day.
They make a perfect grab-and-go breakfast when I’m in a hurry and don’t have time to cook.
I often pair one with a cup of coffee or a glass of milk for a simple but satisfying morning meal.
They’re also great as a pre- or post-workout snack because they’re full of healthy carbs and protein that keep me energized.
Sometimes, I like to spread a little extra peanut butter or almond butter on top for added richness and creaminess. It makes them taste almost like dessert but still healthy.
If you want to serve them as a dessert, drizzle a bit of melted dark chocolate on top or sprinkle sea salt before baking for that sweet and salty balance.
For a kid-friendly version, you can add mini chocolate chips or drizzle some honey before serving.
These bars are also wonderful for picnics, lunchboxes, or afternoon snacks.
I’ve also found that they taste even better the next day once the flavors settle.
Whether you eat them warm, cold, or at room temperature, they’re always soft, chewy, and full of flavor.
You can even crumble them over yogurt or smoothie bowls for a fun breakfast twist.
Can We Make Banana Peanut Butter Oatmeal Bars in Advance?
Yes, you can definitely make these Banana Peanut Butter Oatmeal Bars in advance, and that’s one of the reasons I love this recipe so much. They stay fresh for days and are perfect for prepping ahead of a busy week. I usually bake a batch on Sunday and enjoy them throughout the week without worrying about breakfast or snacks.
To make them in advance, prepare and bake the bars as usual, then let them cool completely before slicing.
Once cooled, store them in an airtight container at room temperature for up to three days. If you want them to last longer, keep them in the refrigerator, where they stay fresh for up to a week.
For longer storage, you can freeze them. Just wrap each bar individually in parchment paper and place them in a freezer-safe bag or container. This makes it easy to grab one whenever you need a quick snack.
To eat, simply thaw them at room temperature for about 15–20 minutes or warm them in the microwave for a few seconds.
These bars are perfect for meal prep because they maintain their texture even after freezing and reheating.
I love keeping a few in my freezer for busy mornings or road trips. They’re a great alternative to store-bought granola bars and so much healthier.
You’ll save time, reduce waste, and have a wholesome snack ready whenever you need it.
Tips and Tricks
Always use ripe bananas with lots of brown spots because they add more natural sweetness and moisture.
If your bananas aren’t ripe enough, you can bake them in their peels for a few minutes to soften and sweeten them.
When mixing the ingredients, don’t over-stir the batter. Just mix until everything is combined so the bars stay tender and not dense.
If you want a softer texture, you can use quick oats instead of rolled oats, but rolled oats give a chewier bite that most people love.
If you like your bars sweeter, you can add a tablespoon of brown sugar or extra honey, but I usually rely on the natural sweetness of bananas.
Finally, let the bars cool completely before cutting them. This is one of the most important steps because it helps the bars firm up.
If you cut them while still warm, they may crumble or fall apart. Patience here really pays off.
Variations of Banana Peanut Butter Oatmeal Bars
You can easily switch up the ingredients to create different versions of these bars depending on your mood or what’s in your pantry. I often make different flavors each week so I never get bored.
If you love chocolate, try adding cocoa powder to the batter for a rich, brownie-like flavor.
You can also mix in dark or semi-sweet chocolate chips for extra indulgence.
For a nutty twist, swap peanut butter with almond or cashew butter and top with chopped nuts like walnuts or pecans.
For a fruity version, add dried cranberries, raisins, or chopped dates for natural sweetness and chewiness. You can also fold in shredded coconut for a tropical touch.
Sometimes, I even add a handful of fresh blueberries or raspberries before baking for bursts of flavor in every bite.
If you want a protein boost, mix in a scoop of vanilla protein powder and reduce the oats slightly to balance the texture. It’s a great way to turn these bars into a post-workout snack.
For a crunchy variation, toss in some crushed pretzels or granola pieces before baking.
You can also turn these bars into breakfast squares by topping them with Greek yogurt and fresh banana slices.
Storage Instructions
Proper storage is the key to keeping these Banana Peanut Butter Oatmeal Bars fresh and delicious for days.
Once they’ve completely cooled, I like to cut them into even squares and store them in an airtight container.
If you plan to eat them within a few days, keeping them at room temperature is perfectly fine.
Just make sure the container is tightly sealed to prevent them from drying out.
If you want them to last longer, storing them in the refrigerator is a great option. They can stay fresh for up to a week when refrigerated, and the cool temperature helps maintain their chewy texture. I usually place a small piece of parchment paper between each layer to keep them from sticking together.
For long-term storage, freezing works beautifully. Simply wrap each bar individually in parchment paper or plastic wrap, then place them all in a freezer-safe bag or container.
This makes it easy to grab one whenever you need a quick snack or breakfast.
When you’re ready to eat, just let a bar thaw at room temperature for about 15–20 minutes, or warm it up gently in the microwave.
Frozen bars taste just as good as freshly baked ones, and they’re perfect for meal prep or busy mornings.
Keeping a batch in the freezer means you’ll always have a healthy, homemade snack ready whenever hunger strikes.
Banana Peanut Butter Oatmeal Bars Recipe
Course: DessertsCuisine: AmericanServings
12
servingsPrep time
10
minutesCooking time
25
minutesCalories
180
kcalTotal time
35
minutesThese Banana Peanut Butter Oatmeal Bars are soft, chewy, and naturally sweetened with ripe bananas and honey. They’re perfect for a quick breakfast, post-workout snack, or a healthy dessert. Made with simple, wholesome ingredients, these bars are gluten-free, dairy-free, and can easily be made vegan.
Ingredients
2 ripe bananas
1/2 cup creamy peanut butter
1/4 cup honey or maple syrup
2 cups rolled oats (use gluten-free oats if needed)
1 teaspoon vanilla extract
1/2 teaspoon cinnamon
1/2 teaspoon baking powder
Pinch of salt
Optional: 1/4 cup dark chocolate chips, chopped nuts, or dried fruits
Directions
- Mash the Bananas: In a large mixing bowl, mash the ripe bananas until smooth.
- Add Wet Ingredients: Add peanut butter, honey (or maple syrup), and vanilla extract. Stir until well combined.
- Mix Dry Ingredients: Add rolled oats, cinnamon, baking powder, and salt. Mix until evenly blended.
- Add Optional Ingredients: Fold in any add-ins like chocolate chips or nuts if desired.
- Bake: Line an 8×8-inch baking dish with parchment paper. Spread the mixture evenly and press down firmly. Bake at 350°F (175°C) for 20–25 minutes, until edges are golden.
- Cool and Slice: Let the bars cool completely before cutting into squares or rectangles.
Notes
- Use overripe bananas for the best flavor and sweetness.
To make vegan bars, substitute honey with maple syrup.
Store leftovers in an airtight container for up to 3 days at room temperature or 1 week in the refrigerator.
You can freeze the bars for up to 2 months; thaw before eating.
Recipe FAQs
Can I use instant oats instead of rolled oats?
Yes, you can use instant oats if that’s what you have on hand. The texture will be a bit softer and less chewy, but the bars will still taste delicious. Rolled oats give a heartier bite, while instant oats make them slightly more cake-like.
Can I make these bars nut-free?
Absolutely! You can replace the peanut butter with sunflower seed butter or tahini for a nut-free version. The flavor will be slightly different, but the bars will still hold together well and taste great.
Do I have to use honey or maple syrup?
You don’t have to, but adding a small amount helps bind the bars and gives them a nice sweetness. If you prefer, you can replace it with agave syrup or even date syrup for a different flavor.
Can I add protein powder to these bars?
Yes, adding a scoop of protein powder works well in this recipe. Just reduce the oats slightly so the mixture doesn’t get too dry. It’s a great way to make the bars more filling and ideal for post-workout snacks.
Can I use chunky peanut butter instead of creamy?
Definitely! Chunky peanut butter adds bits of peanuts for a little extra crunch. If you love texture in your bars, this is a great option. Just make sure to mix it well so it blends evenly.
How do I know when the bars are fully baked?
The bars are ready when the edges are golden brown and the top looks set. They may still feel soft in the center, but they’ll firm up as they cool. Avoid overbaking, as that can make them dry.
Can I serve these bars cold?
Yes, they taste wonderful straight from the fridge. The cool temperature makes them denser and chewier, which I personally enjoy. They’re refreshing during warmer months and still just as flavorful.
Conclusion
These Banana Peanut Butter Oatmeal Bars are one of those recipes I never get tired of making.
They’re easy, healthy, and so satisfying no matter when you eat them.
I love how they combine the natural sweetness of bananas with the creamy richness of peanut butter and the hearty texture of oats.
Whether you enjoy them for breakfast, as a snack, or even as a dessert, they always hit the spot.
They’re perfect for meal prep, simple to customize, and completely guilt-free. I find myself baking a batch almost every week because they’re so convenient and delicious.
If you’re looking for a recipe that’s wholesome, naturally sweet, and full of flavor, these bars are a must-try.
Once you make them, you’ll understand why they’re such a favorite in my kitchen. They’re proof that healthy eating doesn’t have to be complicated—it can be comforting, tasty, and easy all at once.