Skip to content
The Best Fluffy Pancakes recipe you will fall in love with. Full of tips and tricks to help you make the best pancakes.
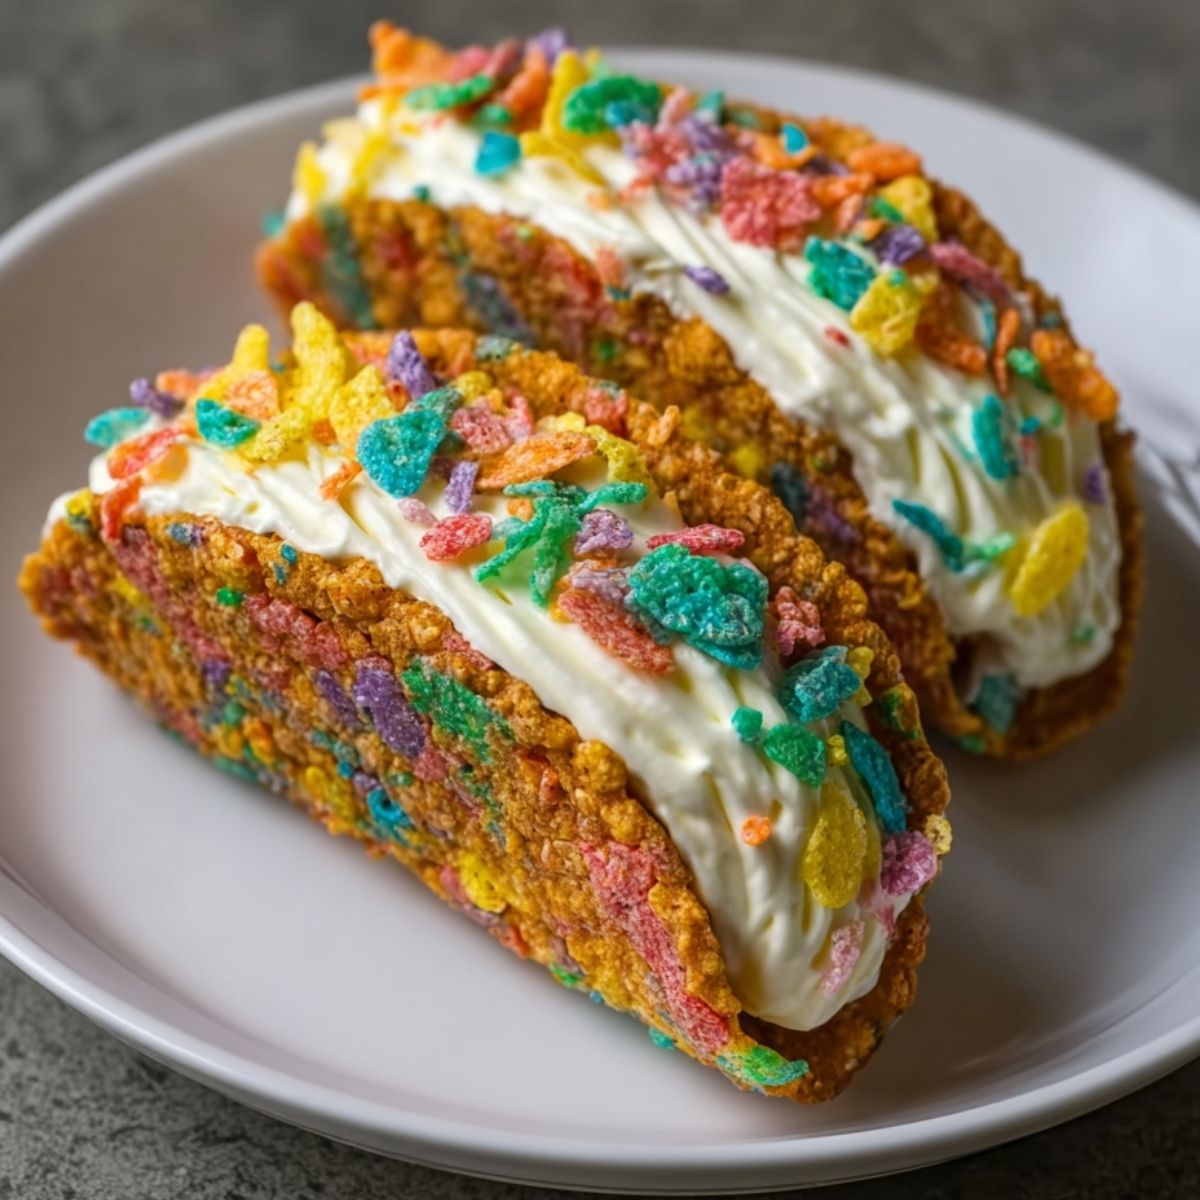
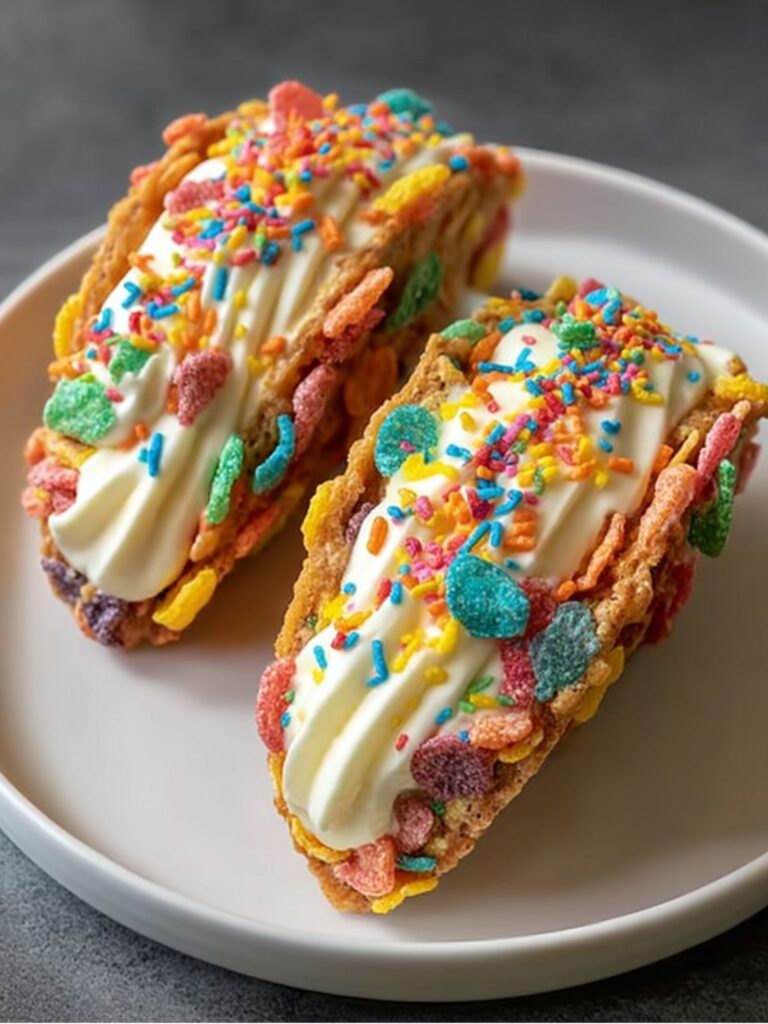
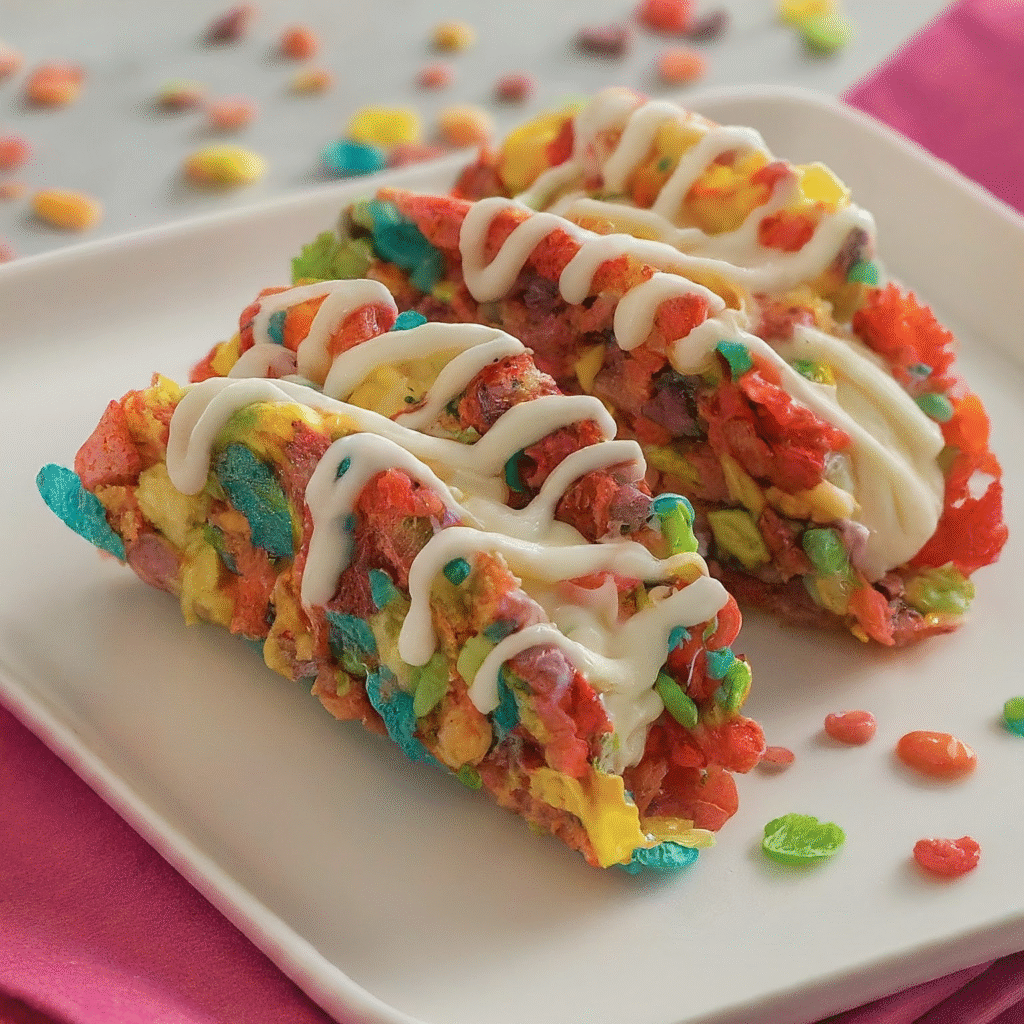
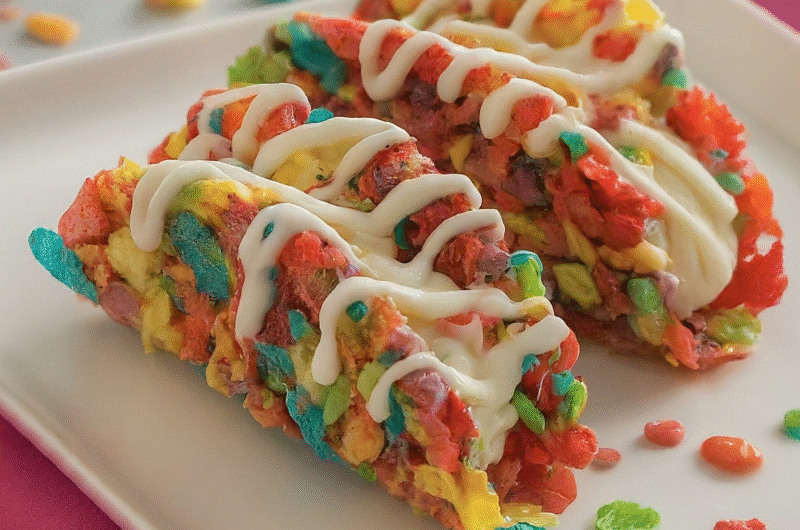
Easy Fruity Pebbles Cheesecake Tacos Recipe
By Jennifer
I love discovering fun, colorful desserts that make everyone smile, and this Fruity Pebbles Cheesecake Tacos recipe is exactly that!
Jump to RecipeImagine creamy cheesecake tucked inside a crunchy taco shell, then rolled in a rainbow of Fruity Pebbles cereal—it’s like breakfast and dessert had the most delicious baby.
I enjoy making these for weekend treats, birthday parties, or even just a fun snack after school. They are quick to prepare and are guaranteed to impress kids and adults alike.
What I love most about this recipe is how versatile it is. You can enjoy it cold straight from the fridge or serve it as a show-stopping dessert at your next gathering.
It’s sweet, crunchy, creamy, and colorful all at once, which makes it a treat that’s hard to resist.
Whether you’re looking for a quick snack or a festive dessert idea, these cheesecake tacos are a total winner. I can’t wait for you to try them and see how easy it is to make a dessert that’s as fun to eat as it is to make.
Quick Recipe Info
| Attribute | Details |
|---|---|
| Calories | 350 per taco |
| Protein | 6g |
| Carbohydrates | 45g |
| Fat | 18g |
| Gluten-Free | No (taco shell & cereal contain gluten) |
| Vegan | No (contains cream cheese and butter) |
| Prep Time | 15 minutes |
| Cook Time | 0 minutes (no-bake) |
| Total Time | 15 minutes |
| Servings | 4-6 tacos |
| Cuisine | American / Fun Dessert |
| Course | Dessert |
Why You’ll Love This Recipe
- Easy and Quick: You don’t need an oven or complicated steps—perfect for busy days.
- Fun and Colorful: The rainbow of Fruity Pebbles makes it visually appealing.
- Kid-Friendly: A hit for kids’ parties, school snacks, or playdates.
- Versatile: Enjoy as a snack, dessert, or even a breakfast treat.
- Customizable: Add chocolate drizzle, berries, or whipped cream to make it your own.
- No Baking Required: It’s a no-bake recipe, so it’s perfect for hot days or last-minute desserts.
Ingredients to Make Fruity Pebbles Cheesecake Tacos
Before you start making these fun and colorful tacos, let’s gather all the ingredients. Here’s what you’ll need:
Ingredients:
- Taco shells (4-6 small) – These form the base of your dessert. You can use mini waffle cones shaped like tacos or store-bought taco shells. They should be sturdy enough to hold the cheesecake filling without breaking.
- Cream cheese (8 oz, softened) – The main ingredient for the creamy cheesecake layer. Softened cream cheese mixes easily and gives a smooth, rich texture.
- Powdered sugar (1/2 cup) – Sweetens the cream cheese filling. Adjust to your taste if you like it more or less sweet.
- Vanilla extract (1 tsp) – Adds a lovely aroma and depth of flavor to the cheesecake mixture.
- Heavy whipping cream (1/2 cup, chilled) – Whipped and folded into the cream cheese mixture, it makes the filling light and fluffy.
- Fruity Pebbles cereal (1 cup) – The star of the show! Adds color, crunch, and a playful vibe to the tacos. You’ll coat the edges of the cheesecake with this.
- Butter (2 tbsp, melted) – Optional, for brushing the taco shells lightly if you want a richer taste and slight crispness.
- Chocolate or caramel drizzle (optional) – For extra sweetness and decoration. Adds a finishing touch if you want your tacos to look more festive.
Steps to Make Fruity Pebbles Cheesecake Tacos
Making these cheesecake tacos is simple and fun. Follow each step carefully to get perfectly creamy, colorful, and crunchy tacos that everyone will love.
Step 1: Prepare the Taco Shells
Start by preparing your taco shells. If you’re using mini waffle cones or store-bought taco shells, gently shape them into taco forms if needed. You can lightly brush them with melted butter for extra flavor and slight crispiness. Set them aside on a tray to cool if they’ve been warmed. This will make them sturdy enough to hold the cheesecake filling without breaking.
Step 2: Make the Cheesecake Filling
In a mixing bowl, beat the softened cream cheese until smooth and creamy. Add powdered sugar and vanilla extract, and mix until fully combined. In a separate bowl, whip the heavy cream until soft peaks form, then gently fold it into the cream cheese mixture. This will make the filling light, fluffy, and easy to scoop into the taco shells.
Step 3: Assemble the Cheesecake Tacos
Take your prepared taco shells and spoon the cheesecake filling into each shell, filling it generously but without overstuffing. Smooth the top slightly with a spoon or spatula.
Step 4: Coat the Tacos with Fruity Pebbles
Pour Fruity Pebbles cereal into a shallow bowl. Gently press the edges or top of each cheesecake taco into the cereal, ensuring the colorful crunch sticks to the filling. This step gives the tacos their signature vibrant, fun appearance and adds a delightful texture.
Step 5: Optional Drizzle and Finishing Touches
If desired, drizzle chocolate or caramel over the filled tacos for an extra layer of sweetness and decoration. You can also add whipped cream or sprinkles on top for a party-ready presentation.
Step 6: Chill Before Serving
Place the assembled cheesecake tacos in the refrigerator for at least 30 minutes to let the filling set. Chilling helps the tacos hold their shape and makes them even more refreshing to enjoy.
Serving Suggestions
These Fruity Pebbles Cheesecake Tacos are colorful, fun, and perfect for any occasion. Here are some ways I like to serve them:
As a Party Dessert: Arrange the tacos on a bright platter. The rainbow of Fruity Pebbles makes them stand out instantly, making them a hit at birthday parties or family gatherings. If you enjoy fun, no-bake desserts, you might also love a Pecan Pie Lasagna for your dessert table.
With Ice Cream: Serve the tacos alongside a scoop of vanilla or chocolate ice cream. The creamy ice cream pairs perfectly with the crunchy taco and Fruity Pebbles, just like how Garlic Parmesan Cheeseburger Bombs combine fun flavors in a snack-size treat.
With Fresh Fruits: Add slices of strawberries, blueberries, or bananas for a refreshing contrast to the sweet cheesecake.
Breakfast or Snack Fun: Believe it or not, these tacos make a playful breakfast treat too. Pair them with a glass of milk or a smoothie for a colorful morning indulgence.
Can We Make Fruity Pebbles Cheesecake Tacos in Advance?
One of the best things about Fruity Pebbles Cheesecake Tacos is that they can be prepared ahead of time, making them perfect for busy days, parties, or special events. Planning in advance not only saves time but also allows the flavors to meld together beautifully, giving you a creamier and more delicious dessert.
Make the Filling Ahead: You can prepare the cheesecake filling a day or two in advance. Store it in an airtight container in the refrigerator. This way, when it’s time to assemble, all you have to do is fill the taco shells and add the Fruity Pebbles.
Assemble the Tacos in Advance: If you want to prepare the entire taco ahead, assemble them and keep them chilled in the fridge for up to 4-6 hours. Place the tacos on a tray and cover them loosely with plastic wrap to prevent the cereal from getting soggy.
Do Not Freeze: Freezing is not recommended for this dessert because the cheesecake filling may change texture and the Fruity Pebbles will lose their crunch.
Quick Serving Tip: If the tacos have been chilled, take them out of the fridge 5-10 minutes before serving. This allows the filling to soften slightly for the perfect bite.
Making these ahead of time is especially useful for parties or when you need a fun, colorful dessert ready to go without the last-minute rush.
Tips and Tricks
Here are some helpful tips and tricks to make your Fruity Pebbles Cheesecake Tacos turn out perfectly every time:
- Use Room Temperature Cream Cheese: Make sure your cream cheese is softened to room temperature before mixing. This ensures a smooth and creamy filling without lumps.
- Chill Whipped Cream Properly: For a fluffy and stable filling, chill your heavy whipping cream before whipping. Cold cream whips faster and holds its shape better.
- Press Cereal Gently: When coating the tacos with Fruity Pebbles, press gently so the cereal sticks to the filling without breaking the taco shell.
- Avoid Overfilling: While it’s tempting to pile on the cheesecake filling, overfilling can cause the taco shell to crack or the filling to spill. Fill just enough for a generous bite.
- Use a Piping Bag for Neatness: For a clean and professional look, pipe the cheesecake filling into the taco shells using a piping bag instead of spooning it.
- Add Extra Flair: Consider drizzling chocolate or caramel over the tacos for an added touch of flavor and decoration. You can also sprinkle mini chocolate chips or chopped nuts for extra texture.
- Keep Chilled Until Serving: These tacos are best enjoyed cold. Keep them refrigerated until serving to maintain the creamy filling and crunchy Fruity Pebbles.
Variations of Fruity Pebbles Cheesecake Tacos
One of the best things about Fruity Pebbles Cheesecake Tacos is how easy it is to customize them to suit your taste or the occasion. Here are some fun variations you can try:
Chocolate Lovers’ Tacos: Add a layer of chocolate ganache or drizzle melted chocolate over the finished tacos. You can also mix mini chocolate chips into the cheesecake filling for extra richness.
Berry Delight: Top the tacos with fresh berries like strawberries, blueberries, or raspberries. You can even fold some berry puree into the filling for a fruity twist.
Peanut Butter Twist: Add a swirl of peanut butter into the cheesecake filling or drizzle on top before adding the Fruity Pebbles. This creates a creamy, nutty flavor that pairs wonderfully with the sweetness.
Mini Taco Version: Make bite-sized tacos for parties or snacks. Use small waffle cones or cut larger taco shells in half. These are perfect for kids’ gatherings or dessert buffets.
Festive Toppings: Swap Fruity Pebbles for other cereals or crushed cookies to match holidays or celebrations. For example, use crushed peppermint for Christmas or pastel-colored cereal for Easter.
Vegan or Dairy-Free Version: Use dairy-free cream cheese and coconut cream whipped topping to make a vegan-friendly version. While the texture may differ slightly, it still creates a fun and colorful treat.
Storage Instructions
Proper storage is key to keeping your Fruity Pebbles Cheesecake Tacos fresh, colorful, and delicious. Here’s how to store them effectively:
Refrigeration: Store the tacos in the refrigerator for up to 4-6 hours before serving. Place them on a tray and cover loosely with plastic wrap to prevent the Fruity Pebbles from getting soggy.
Avoid Freezing: Freezing is not recommended because the cheesecake filling may change texture and the cereal will lose its crunch, making the tacos less enjoyable.
Assemble Before Serving: For the best texture, it’s ideal to store the filling separately if you’re making them in advance and assemble the tacos just before serving. This keeps the Fruity Pebbles crispy and the shells from getting soft.
Short-Term Storage Tip: If you have leftovers, store them in an airtight container in the fridge and consume within the same day. The flavors remain best when fresh.
Easy Fruity Pebbles Cheesecake Tacos Recipe
Course: DessertCuisine: AmericanServings
6
servingsPrep time
15
minutesCalories
350
kcalFun, colorful, and no-bake, these Fruity Pebbles Cheesecake Tacos combine creamy cheesecake filling, crunchy taco shells, and a rainbow of Fruity Pebbles cereal. Perfect for parties, snacks, or a playful dessert treat anytime.
Ingredients
4–6 small taco shells (or mini waffle cones shaped like tacos)
8 oz cream cheese, softened
1/2 cup powdered sugar
1 tsp vanilla extract
1/2 cup heavy whipping cream, chilled
1 cup Fruity Pebbles cereal
2 tbsp melted butter (optional, for brushing shells)
Chocolate or caramel drizzle (optional)
Directions
- Prepare the taco shells: Shape your shells if needed, and optionally brush lightly with melted butter. Set aside.
- Make the cheesecake filling: Beat softened cream cheese until smooth. Add powdered sugar and vanilla extract. Whip the heavy cream separately until soft peaks form, then fold into the cream cheese mixture.
- Assemble the tacos: Spoon or pipe the cheesecake filling into each taco shell. Smooth the top lightly.
- Add Fruity Pebbles: Press the edges or top of each taco into a bowl of Fruity Pebbles, ensuring the cereal sticks to the filling.
- Optional drizzle: Add chocolate or caramel drizzle for extra sweetness and decoration.
- Chill: Refrigerate for at least 30 minutes before serving to let the filling set.
Notes
- Make the filling a day in advance for easier assembly.
- Serve immediately after assembling for best texture.
- Avoid freezing; the cereal will lose its crunch.
Recipe FAQs
1. Can I make Fruity Pebbles Cheesecake Tacos ahead of time?
Yes! You can prepare the cheesecake filling a day in advance and store it in the refrigerator. Assemble the tacos just before serving to keep the Fruity Pebbles crunchy. Fully assembled tacos can be refrigerated for 4–6 hours.
2. Can I use a different cereal instead of Fruity Pebbles?
Absolutely! You can use any colorful cereal or even crushed cookies. Just make sure it sticks well to the cheesecake filling and complements the flavors.
3. Are these tacos gluten-free?
No, traditional taco shells and Fruity Pebbles contain gluten. You can try using gluten-free taco shells and a gluten-free cereal alternative to make them gluten-free.
4. Can I make them vegan?
Yes, use dairy-free cream cheese and coconut whipped cream instead of regular cream cheese and heavy cream. While the texture may differ slightly, they will still be delicious.
5. How should I serve them for a party?
Arrange them on a tray or in individual dessert cups for easy serving. You can also add extra toppings like chocolate drizzle, fresh fruit, or sprinkles for a festive look.
6. Can I freeze the cheesecake tacos?
It’s not recommended. Freezing may alter the texture of the cheesecake filling and make the Fruity Pebbles soggy.
Conclusion
Fruity Pebbles Cheesecake Tacos are a fun, colorful, and easy-to-make dessert that’s perfect for parties, snacks, or even a playful breakfast treat. With their creamy cheesecake filling, crunchy taco shell, and rainbow cereal topping, they’re sure to impress both kids and adults.
The best part is how versatile this recipe is—you can customize flavors, add different toppings, or make them in mini sizes for bite-sized fun. Plus, it’s a no-bake recipe, so it’s quick and stress-free to prepare.
Whether you’re serving them chilled at a party or enjoying one as a sweet treat at home, these cheesecake tacos are guaranteed to bring a smile with every bite. Try making them ahead of time, experiment with variations, and enjoy this colorful, delicious dessert anytime!